This guide will walk you through creating a new API token for the Cloudflare API.
Step 0: Create an account
Before you beging, create a new account with Cloudflare. Then login to the Cloudflare dashboard and, on the bottom right of the page, find the Zone ID and Account ID for the domain you want to use.
Step 1: Create Token
From the Cloudflare dashboard, go to My Profile > API Tokens.
Step 2: Select a Token Template
Select a template from the available API token templates or create a custom token. For this example, we’ll use the Edit zone DNS template.
Step 3: Name the Token
Add or edit the token name to describe why or how the token is used. Templates are prefilled with a token name and permissions. For this example, we’ll use the token name Edit zone DNS.
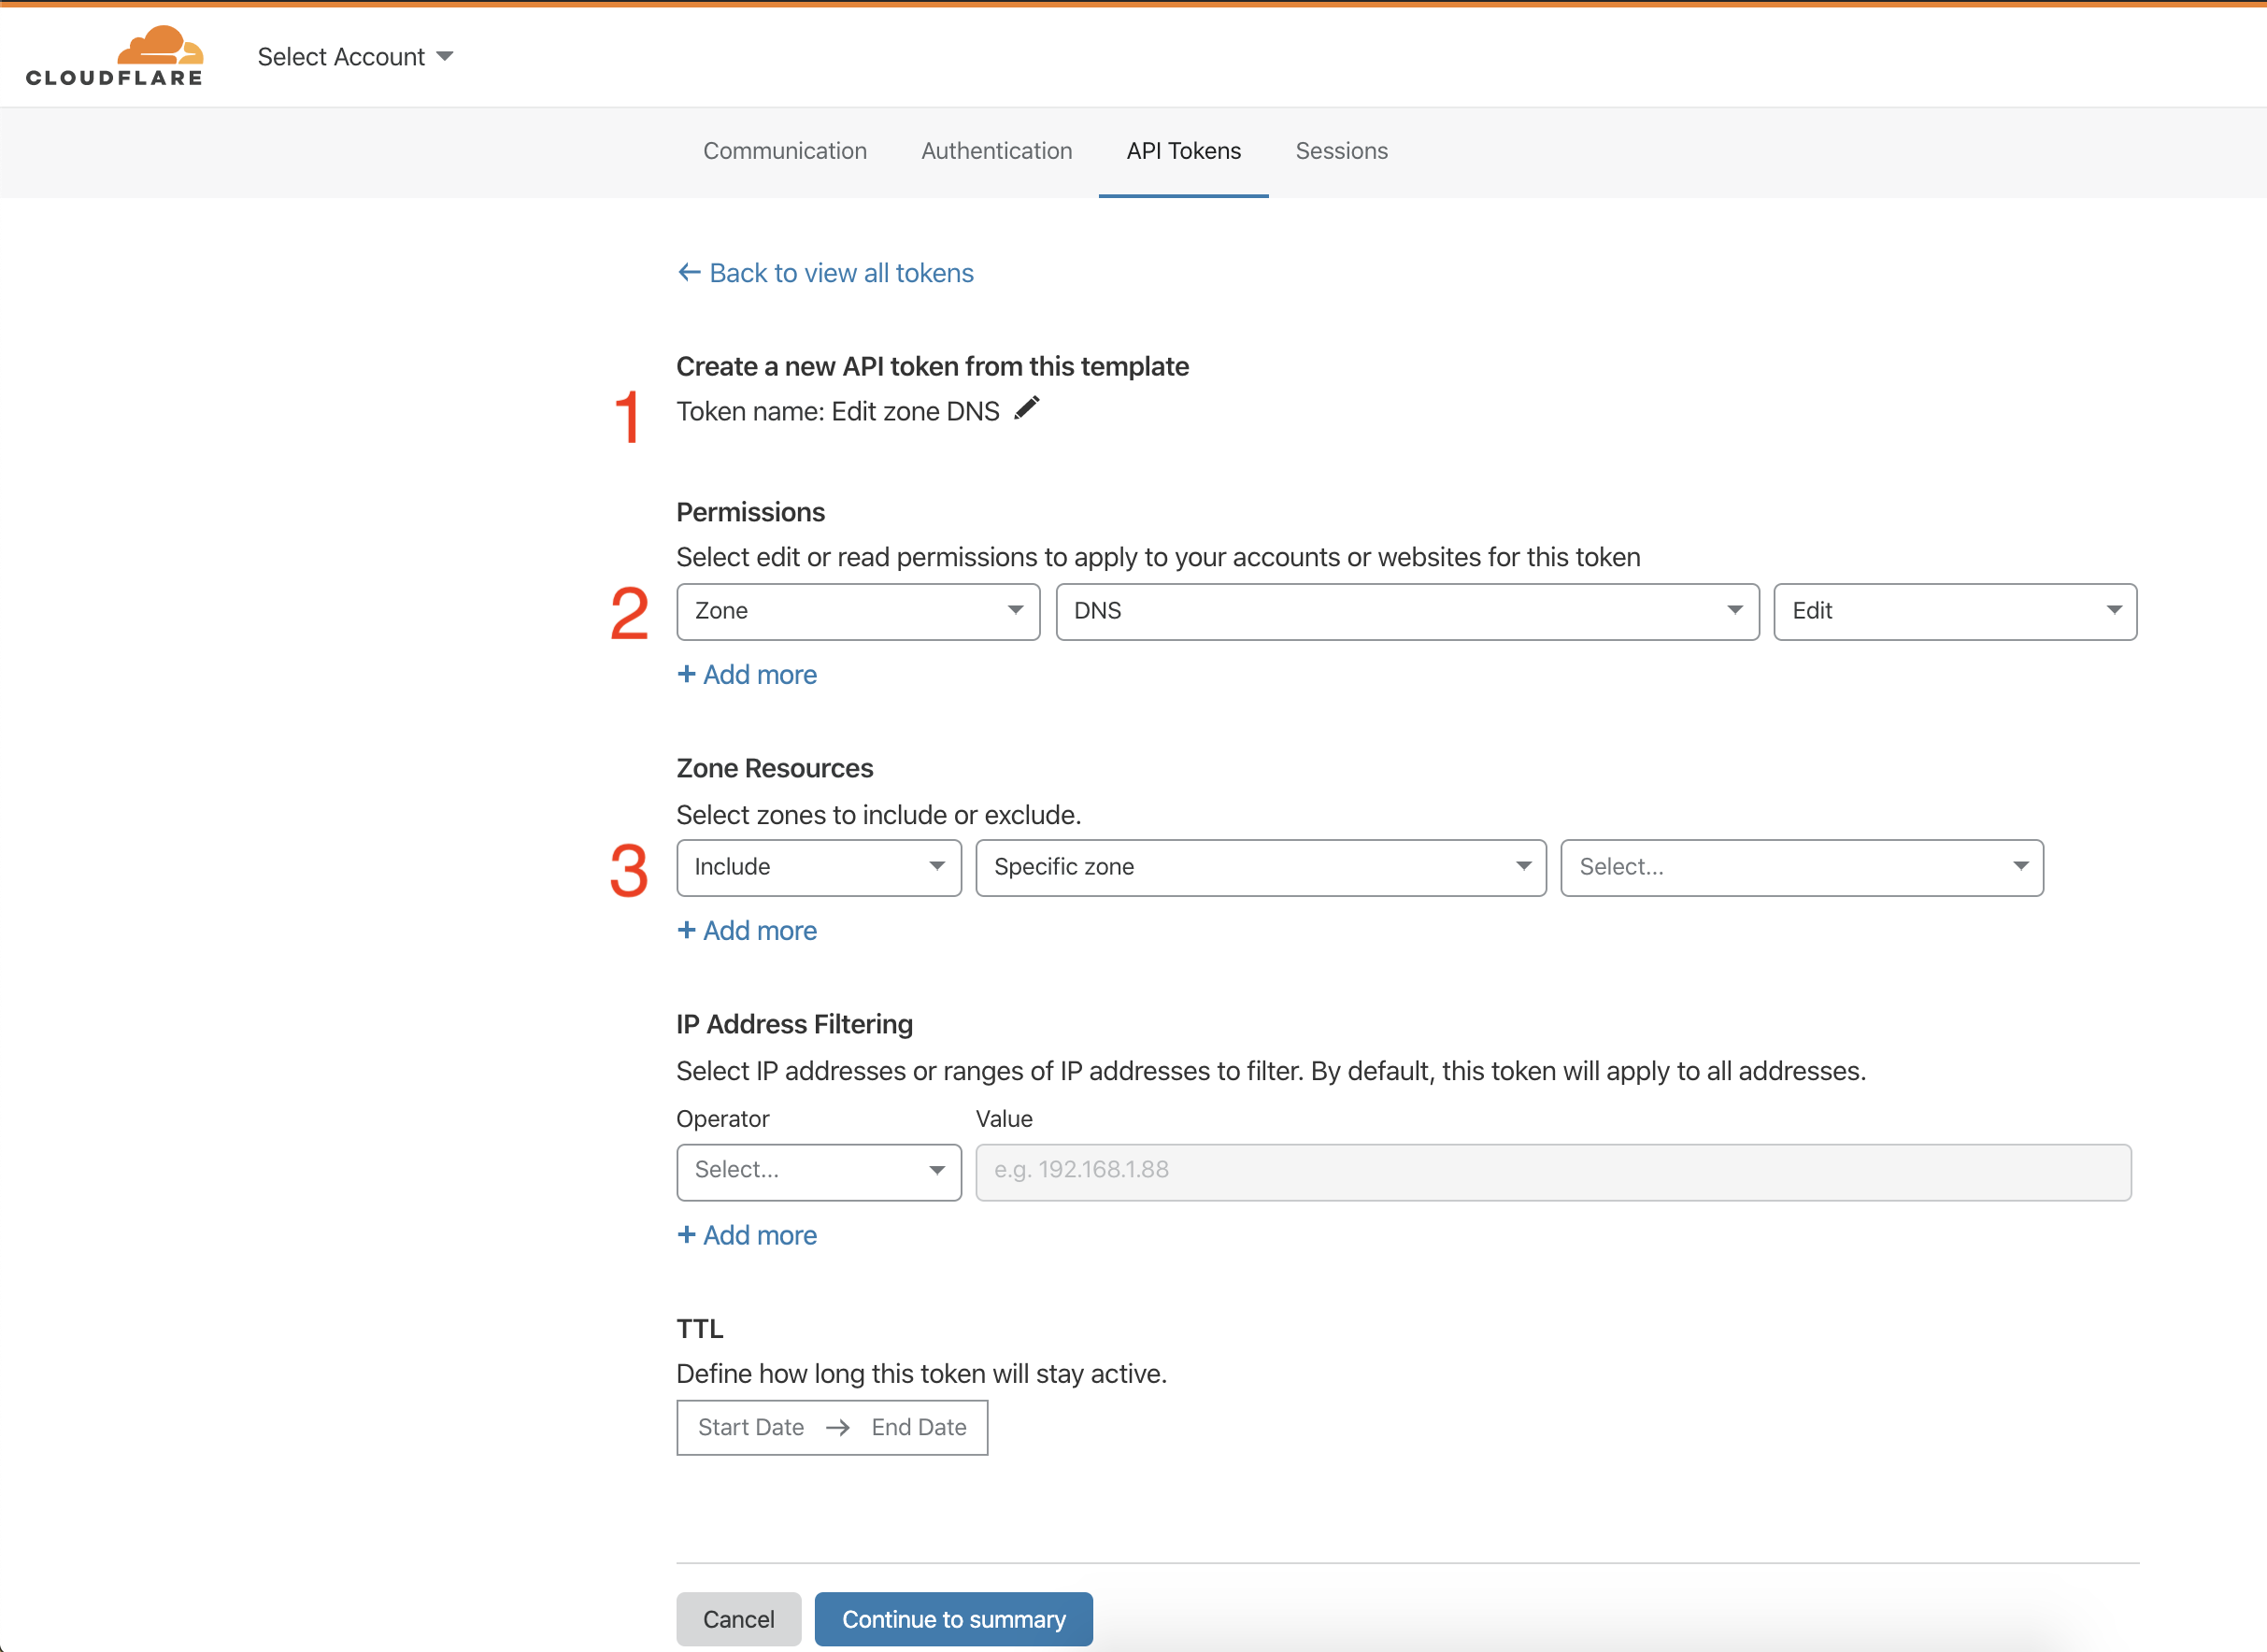
Step 4: Modify the Token Permissions
Modify the token permissions to limit access to the API. Most groups offer Edit or Read options. Edit is full CRUDL (create, read, update, delete, list) access, while Read is the read permission and list where appropriate. Refer to the available token permissions for more information.
Step 5: Select Zone Resources
Select which resources the token is authorized to access. For example, granting Zone DNS Read access to a zone example.com will allow the token to read DNS records only for that specific zone. Any other zone will return an error for DNS record reads operations. Any other operation on that zone will also return an error.
Step 6: (Optional) Add an IP Address Restriction
Restrict how a token is used in the Client IP Address Filtering and TTL (time to live) fields.
Step 7: Select Create Token
Select Create Token to generate the token’s secret. Copy the secret to a secure place! You won’t be able to access it again.
The token secret is only shown once. Do not store the secret in plaintext where others can access it. Anyone with this token can perform the authorized actions against the resources that the token has access to.
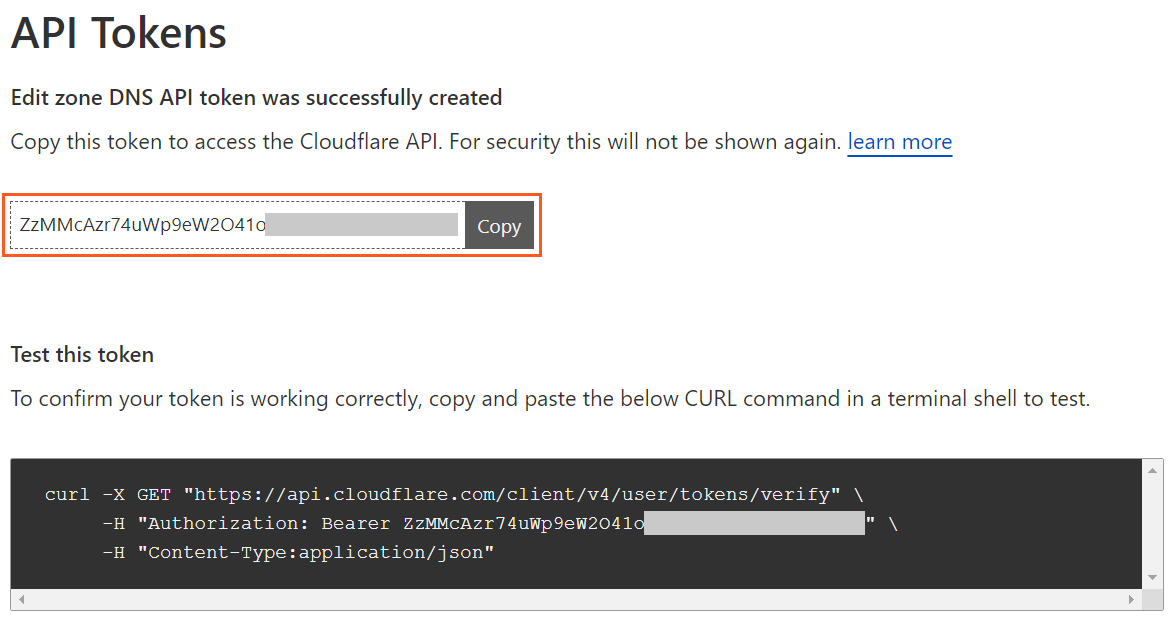
The token secret page also includes an example command to test the token. Use the /user/tokens/verify endpoint to fetch the current status of the given token.
The result:
Congratulations! With this you have successfully created an API token and can start working with the Cloudflare API. After creating your first API token, you can create additional API tokens via the API.